Using indoor drones to obtain inspection footage improves safety, saves time and reduces cost. But the image quality must be as close as possible to human eye perception for an effective inspection that meets standards and doesn’t miss any details.
There are lots of factors that impact image quality. A good quality camera that suits your application is essential, but so is the fundamental knowledge required in order to use it to its full potential.
In this two-part series on image quality, we will first look at how to obtain high quality images from cameras in general. In the second part, we’ll take a deep dive into how to optimise the results you get during a drone-based asset inspection.
Why bigger isn’t always better
When purchasing a camera in any situation, our attention is often drawn to the number of megapixels. It makes sense, as it’s easy to comprehend and is an important factor in image quality. But it’s far from the only factor. In fact, in some cases a smaller number of megapixels may give you exactly the same results.
The concept of “bigger isn’t always better” also applies to the size of lens. Despite what advertising sometimes leads us to believe, there is no universal “best camera” specification, as it depends very much on the intended application. In the case of indoor drone inspections, a smaller lens has a number of benefits.
To understand why megapixels don’t matter as much as we may think, we will take a look into the theory behind digital image quality.
In asset inspection, what matters is the camera’s ability to resolve fine detail. The number of megapixels contributes to this, of course. But so do several other factors, including the lens resolution, aperture size, lighting and exposure, analogue and digital gain.
It may seem like there are lots of things to consider. But don’t worry. Most of these concepts are discussed just to get a basic understanding. Once you have this foundation, we can discuss some practical techniques for field use, in part two. Like how to use lighting well and how to avoid motion blur, to maximize the image quality from your inspection.
Pixel vs. lens resolution
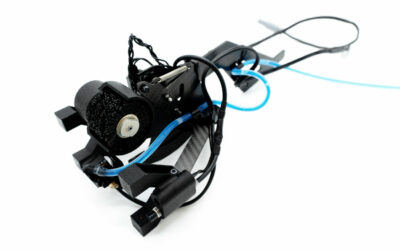
The camera on the Scout 137 drone has a resolution of 3840 x 2160 pixels, which means that it captures and stores video in 4K resolution and still images at a 8.3 megapixel resolution. Here is a guide to how megapixels relate to resolution:
| Full name | Short name | Width and height (px) | Megapixels |
| SD (Standard Definition) | 480p | 640 x 480 | 0.3 |
| HD (High Definition) | 720p | 1280 x 720 | 0.9 |
| Full HD | 1080p | 1920 x 1080 | 2 |
| 4K | 2160p | 3840 x 2160 | 8.3 |
A camera with a high pixel resolution is a good starting point, but you’ll only be able to take advantage of the pixel resolution if the lens resolution matches it. The lens resolution is affected by two main phenomena.
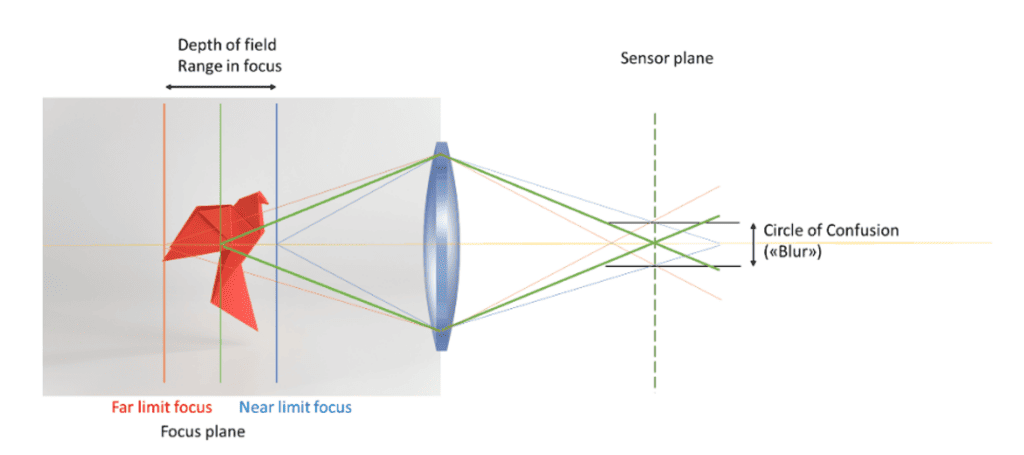
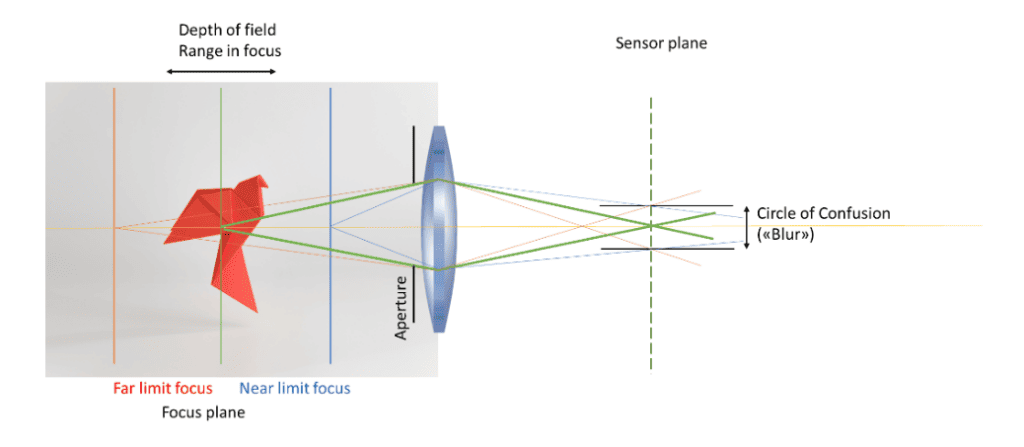
Circle of least confusion
Typically, a lens will not focus all light perfectly. In practice, light coming from each point on the object will be slightly blurred out and appear as a circular spot on the sensor. This circular spot is called the Circle of Confusion. The smallest distinct spot that the lens can produce when the image is as perfectly in focus as possible, is called the Circle of least Confusion, or the CoC limit.


Consider that the pixel size of a camera is actually the area of each single light receptor on the camera’s sensor chip. If the CoC limit is larger than that area, adding more megapixels to the sensor will not make a difference to image quality. The blur effect from the Circle of Confusion will only be represented on more pixels and the camera will not be more able to resolve fine detail.

The role of diffraction
The CoC limit of any lens generally depends on the quality of the lens, the “perfectness” of its shape. Ultimately though, any lens is limited by an optical effect called diffraction, which is present no matter how perfectly manufactured the lens is.
Diffraction is not that prominent for larger-aperture cameras. But it’s more important for cameras with very small apertures, like most mobile phone cameras and the small cameras often carried by internal inspection drones.
When light passes through a small opening, nearby rays will interfere with each other and create a pattern known as an Airy disc (named after George B. Airy) on the camera chip. The diameter of the Airy disc is the diffraction limit of the lens.
This effect puts a limit on the maximum achievable resolution, regardless of of megapixels and lens quality. Similarly to the CoC limit, if the diffraction limit of your lens is larger than the pixel size, then more megapixels will not make a difference to image quality.
Aperture size and depth of field
Generally, large apertures mean more light will enter the camera and you will get brighter images. Small apertures mean that less light will enter the camera, and your images will be darker. Compare letting light onto a piece of paper via a straw and a donut. Which passes more light, the straw or the donut? An excellent experiment for the next visit to your favorite fast-food restaurant.
More technically speaking, the aperture in photography is normally specified by its f-number, which represents the ratio between the focal length of a lens and the diameter of its aperture opening.
For example, for a lens with focal length 10mm and a 5mm wide aperture, the f-number will be f/2 (because 10 mm / 5 mm = 2). Aperture sizes typically range from the widest at f/1.4 which we would call a sensitive lens, to the narrowest at f/32. The donut and the straw, respectively.
Now, it’s beginning to sound like small apertures are less useful than larger ones, isn’t it? But of course, it depends on the application. Let’s see how small apertures can in fact sometimes be the ideal.
While large-aperture, sensitive lenses have the advantage that they let more light flow onto the image sensor, small aperture lenses have the advantage that they provide a large depth of field. This means that the range or distance of objects that will be in focus, is greater. But less light will flow onto the image sensor, meaning that the image will be darker. This is the eternal trade-off of lens apertures.
In traditional portrait photography, large lenses with wide apertures are popular. A small depth of field allows photographers to put the subject’s face in focus with a blurred background. Large apertures are also used in some drone applications, especially outdoors. Drones used for flare stack inspections where heat prevents close proximity, use large and heavy telephoto lenses with high light sensitivity, in order to get enough light into the sensor when zooming in.
However, inspection of indoor industrial spaces usually demand a large depth of field to keep both the foreground object and nearby structures in focus. It will also give the pilot more flexibility when flying, with respect to the distance from the drone to the surface under inspection.
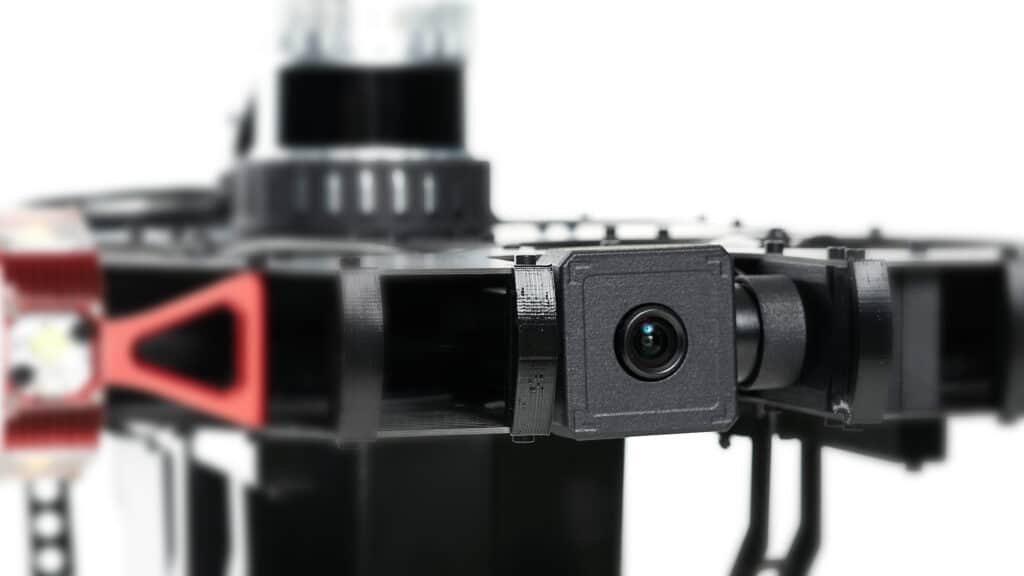
The Scout 137 drone’s camera does this. With a focal length of 3.7mm and an f-number of f/2.8, the lens gives us a horizontal field view of 83 degrees and a vertical field view of 53 degrees, with reasonably good light sensitivity. The large depth of field enables us to capture images with very high spatial resolution when close to objects and structures, while allowing flexibility as to how close to the surface you need to fly.
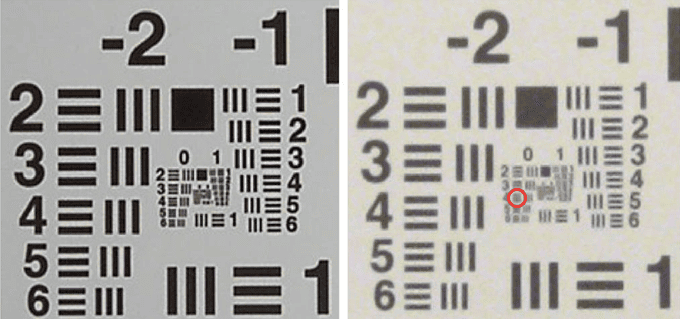
Testing a camera’s spatial resolution
The ability of a camera system to resolve fine detail, or distinguish features that are extremely close together, is known as the spatial resolution. This is ultimately what we mean by image quality.
Testing a camera’s spatial resolution takes multiple factors into account, including pixel resolution, focus, motion blur, diffraction and compression artefacts to give you a much more holistic image quality result.
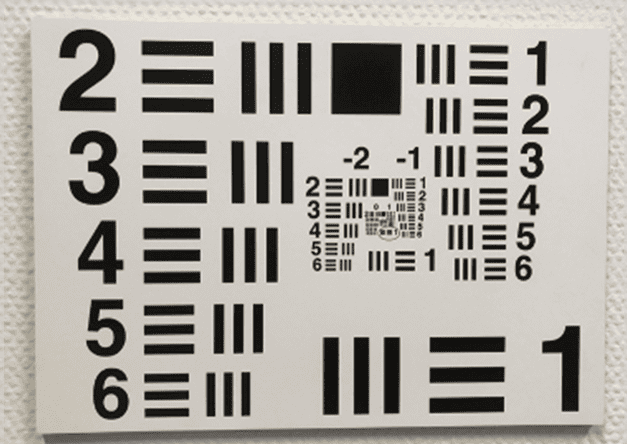
The most common measurement of spatial resolution is given in line pairs per millimetre (lp/mm). A resolution of 1 lp/mm means that we are able to distinguish two black lines with a 0.5mm white gap between them.

Originally defined by the U.S. Air Force, the USAF 1951 resolution test chart is widely used in optical engineering to determine the characteristics of imaging systems. It’s essentially the machine equivalent of the human eye chart we see in an opticians’ examination room.
Just like a human eye, the distance from an inspection drone to an object of interest plays a major role in final image quality. The aim of course is to enable remote visual inspections at equivalent quality to direct human observation. The ISO 4628 series of standards detail the minimum image quality criteria for engineering defect assessments, summarized in this table.
| Application | Spatial resolution (lp/mm) | Derivation / source |
| ISO 4628-[X] Coating assessment | ~0.3 – 1 | Obtained from a questionnaire survey |
| ISO 4628-2 Assessment of degree of blistering | 1 – 3 | Should be clearly visible with normal corrected vision (up to 0.5 mm) (ISO size 3) |
| ISO 4628-2 Assessment of degree of rusting | ||
| ISO 4628-4 Assessment of degree of cracking | 3 | Barely visible (ISO size 2) |
| ISO 4628-5 Assessment of degree of flaking | 0.5-2 | 1-3mm largest dimension (ISO size 2) |
| Human vision under perfect conditions | ~3 | Resolution of human eye at 600mm, 20/20 visual acuity |
When choosing a focus distance, a compromise must be struck between depth of field and the desired working distance, as the depth of field increases as a function of distance.
The spatial resolution will typically increase when getting closer to an object, up to a point, as long as the image is in focus. But when focusing the lens at very short distances, the depth of field will be shallow, and the image will quickly go out of focus for larger distances. We talk in more detail about the practical implications of this and what settings we recommend for our Scout 137 drone in part two of this post.
Image exposure and lighting
We already know that the lens aperture plays an important role, since it decides how much light will hit the image sensor per unit time. Exposure time is also an important factor, representing the time that the sensor will be exposed to the incoming light. You can say that the total amount of “collected” light is a product of Area x Time, i.e. aperture_size x exposure_time. Similar to the concept of power vs. energy.
If the exposure time is too short, the image will appear dark with low contrast. If the exposure time is set too long, parts of the image may become saturated, making it difficult to pick out details. A long exposure time also increases the risk of motion blur, making it increasingly difficult to identify detail.
When you have a camera platform that moves around, like a drone, longer exposure times increase the risk of picking up relative movements between the camera and the surface being inspected.
- A moving camera platform increases the risk of motion blur and
- increases the importance of good lighting.
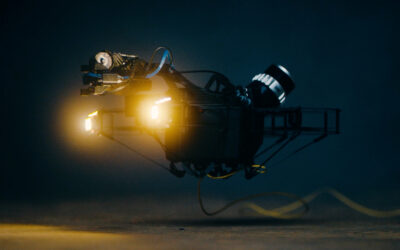
Introducing external lighting— natural or artificial—which becomes a very important third factor. Matching the lighting conditions with the exposure time is an important balance to strike. In indoor industrial spaces, which are often inherently dark, this may be a challenge.
In short, the drone you’re using must carry more than enough artificial light, preferably using a diffuse and even light source. It should also have the available energy to apply as much as possible of it. In summary:
- Bring lots of light and use as much of it as you can, because
- this allows the exposure time to be reduced and
- minimizes the impact of motion blur.
Even though it is possible to alter the brightness of an image after it has been captured, it’s always better to adjust lighting and exposure first to capture the best possible image, rather than relying on post-processing features.
You can read more about the practical aspects of optimizing internal drone inspection images in part 2 of this article!
Analog and digital gain
Gain is a camera setting that controls the amplification of the signal from the camera sensor. Increasing the gain will make images captured in low light situations brighter, but it will also amplify the noise.
The gain setting of a digital camera works much as the ISO value of film for a traditional camera.
High ISO ratings means more light sensitivity, but typically results in images with a grainy appearance. Similarly, using high gains for digital cameras will make the camera more light-sensitive, at the cost of grainy images.
Analog gain is applied to the signal before it is converted to a digital value by the camera’s ADC (analog to digital converter), whereas digital gain is applied directly to the digital pixel values after exposure, to make the image appear brighter.
While digital gain is post-processing and allows the use of analytical methods, we generally recommend not using it. Digital gain will largely increase the amount of noise in the image, and it may result in loss of information due to saturation. We also recommend keeping analog gain at a low level, for similar reasons.
Understanding some of the basics of camera technology is an important step for any operator of an indoor asset inspection drone. In part 2 of this study, we will take a look at how to put this knowledge into practice with the Scout 137 drone.
End of part 1 – click here to read part 2, “Getting better images from indoor drone inspections”.